How to Use LUT Filters: Complete Guide for VN Editor, CapCut & Premiere Pro

Ready to transform your videos with professional color grading? I’ll show you exactly how to use LUT filters in the most popular editing apps. Whether you’re editing on your phone or computer, this guide has got you covered!
Quick Navigation:
- VN Editor Tutorial
- CapCut Guide
- Premiere Pro Instructions
- Password Access Tips
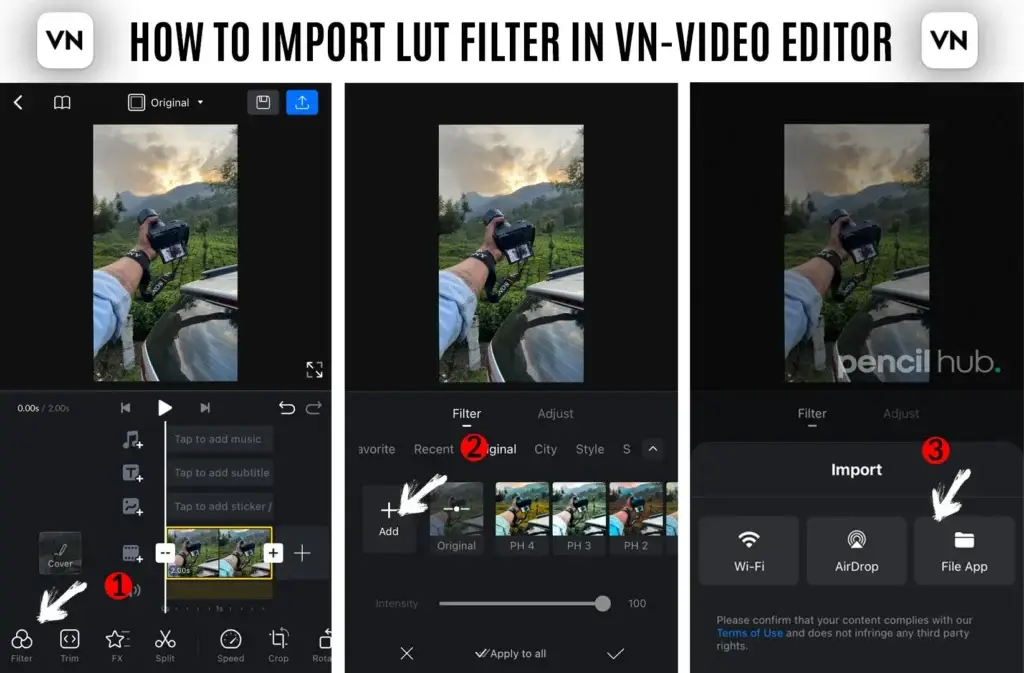
VN Editor: Quick Start Guide
Love editing on your phone? VN Editor makes it super easy to add cinematic colors to your videos. Here’s how:
Getting Started
- Download VN Editor from your app store
- Open the app and hit that ‘+’ to create a new project
- Import your video (tap the big plus button – you can’t miss it!)
Adding Your LUT
- Look for ‘Filters’ or ‘Effects’ in your editing menu
- Find the LUT section (usually under color options)
- Browse through the LUT collection
- Pick your favorite look
Pro Tip: Start with 50% intensity and adjust from there. This keeps your video looking natural while still maintaining that cinematic feel!

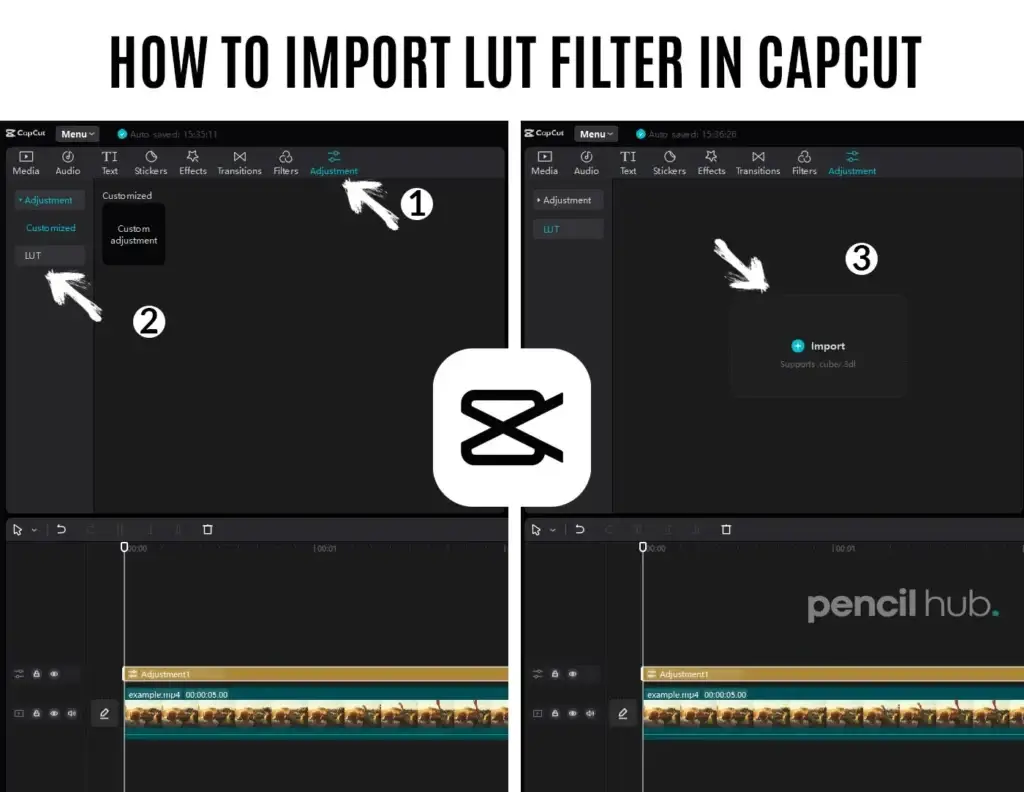
CapCut: Step-by-Step Tutorial
CapCut is absolutely crushing it right now, and their LUT features are amazing. Here’s the perfect workflow:
Initial Setup
- Install CapCut (it’s free!)
- Create a new project
- Import your footage
Adding Color Magic
- Tap your video clip in the timeline
- Find the ‘Effects’ tab
- Look for ‘LUT’ or ‘Color Grading’
- Choose your perfect look
Fine-Tuning
- Adjust the LUT strength (start at 70% – trust me!)
- Play with brightness and contrast
- Check your skin tones
- Preview in full screen

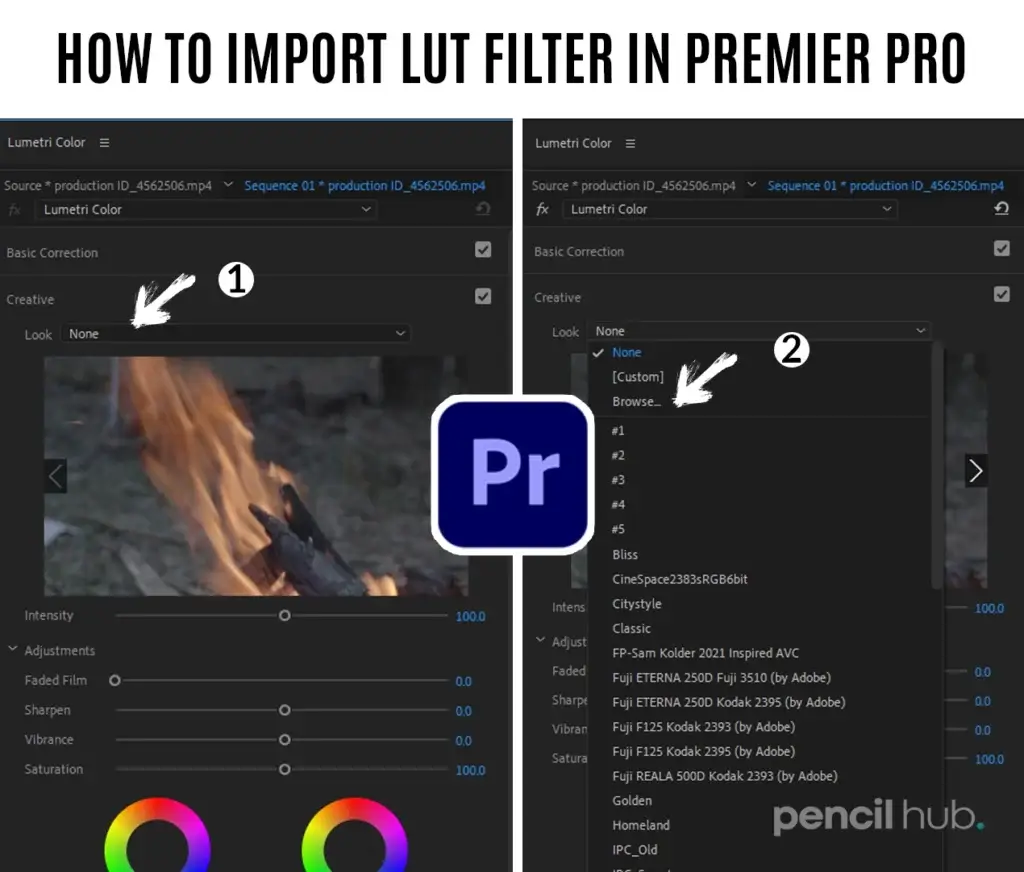
Premiere Pro: Professional Workflow
Ready to level up? Here’s how the pros use LUTs in Premiere:
Setup Phase
- Open Premiere Pro
- Create your project
- Import your footage
The Secret Sauce
- Create an adjustment layer (File > New > Adjustment Layer)
- Drop it above your footage
- Add Lumetri Color effect
- Navigate to the Creative tab
LUT Magic
- Find the ‘Look’ dropdown
- Click ‘Browse’
- Select your LUT file
- Fine-tune the intensity

Quick Tips for All Platforms:
- Always start with well-exposed footage
- Don’t overdo the effect of strength
- Check your video on different screens
- Save your favorite LUT settings as presets
Accessing Password-Protected LUTs
Hey! A quick note about password protection:
- The preset file needs a password to unlock
- You’ll find the password in our tutorial video
- Watch the full video (no skipping!) to catch it
- The password appears at a specific moment
- Password is [ 7485 ]
Important Note:
I’ve included the password clearly but securely in the video. Take your time watching it—I promise it’s worth it!
