How to Create & Use LUT Filters: Complete Guide for Premiere Pro & DaVinci Resolve

Create Professional LUT Filters in Premiere Pro
Want to create your own custom LUT filters? Follow this step-by-step guide to make professional color grades:
Creating LUTs in Premiere Pro
- Import Your Footage
- Open Premiere Pro
- Import your video clip
- Add it to the timeline
- Color Grade Your Clip
- Open Lumetri Color panel
- Adjust colors to your preference
- Create your desired look
- Export Your LUT
- Click three-dot menu in Lumetri panel
- Select “Export LUT”
- Choose save location
- Pick format (.CUBE or .3DL)
- Select appropriate bit depth
- Click OK to save
Pro Tip: Always calibrate your monitor before color grading to ensure accurate results!
Create Professional LUTs in DaVinci Resolve
DaVinci Resolve LUT Creation
DaVinci Resolve is industry-standard for color grading. Here’s how to create premium LUTs:
- Project Setup
- Launch DaVinci Resolve
- Create a new project
- Import your reference footage
- Switch to the Color page
- Color Grading
- Use Color Wheels for primary corrections
- Apply Curves for precise adjustments
- Add Power Windows if needed
- Use Qualifiers for specific colors
- Create your signature look
- Generate LUT
- Right-click your clip/node
- Select “Generate 3D LUT”
- Choose LUT format (recommend 33 point CUBE)
- Select save location
- Name your LUT
- Click “Generate”
Advanced Tips for Resolve:
- Use nodes for organized grading
- Start with a CST (Color Space Transform)
- Create separate nodes for technical vs. creative grades
- Test your LUT on different footage before exporting
Perfect For:
- YouTube Content Creators
- Instagram Influencers
- TikTok Videos
- Professional Filmmakers
- Wedding Videographers
- Mobile Content Creators
Complete Guide: How to Use LUT Filters in Different Editors
1. Adobe Premiere Pro Tutorial
Professional Desktop Editing
- Import Your Footage
- Launch Premiere Pro
- Create new project
- Import your video files
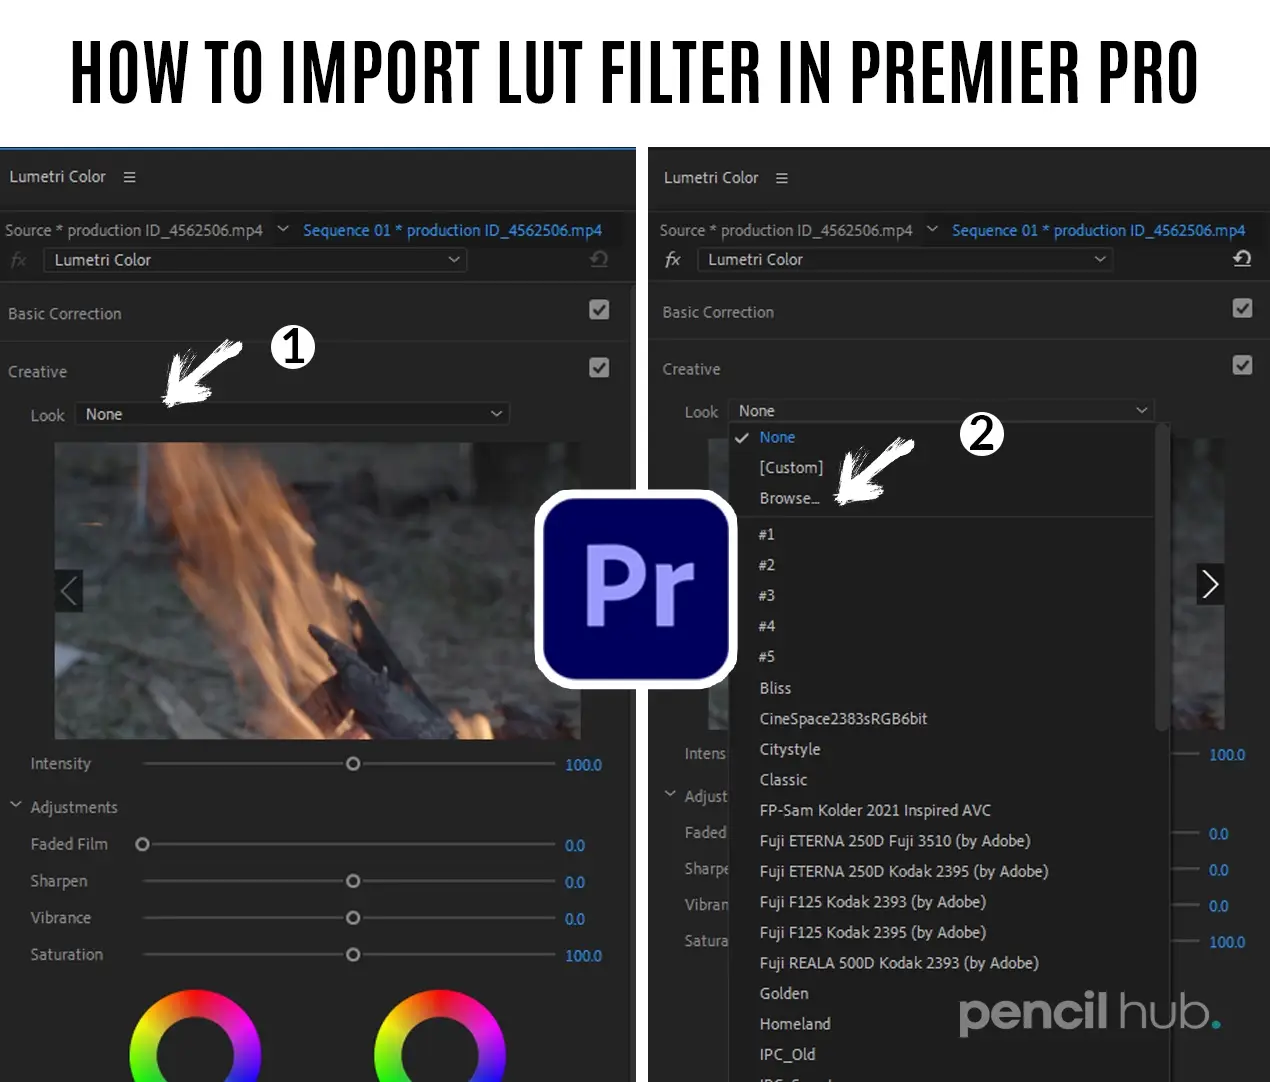
- Apply LUT Filter
- Open Lumetri Color panel
- Navigate to Basic Correction
- Click “Browse” under Input LUT
- Select your downloaded LUT
- Fine-Tune Settings
- Adjust LUT intensity
- Fine-tune exposure
- Balance contrast
- Perfect color temperature
Pro Tip: Start with 50% intensity and adjust based on your footage.

2.CapCut Tutorial (Mobile Editing)
Step-by-Step Guide:
- Project Setup
- Open CapCut
- Create new project
- Import video
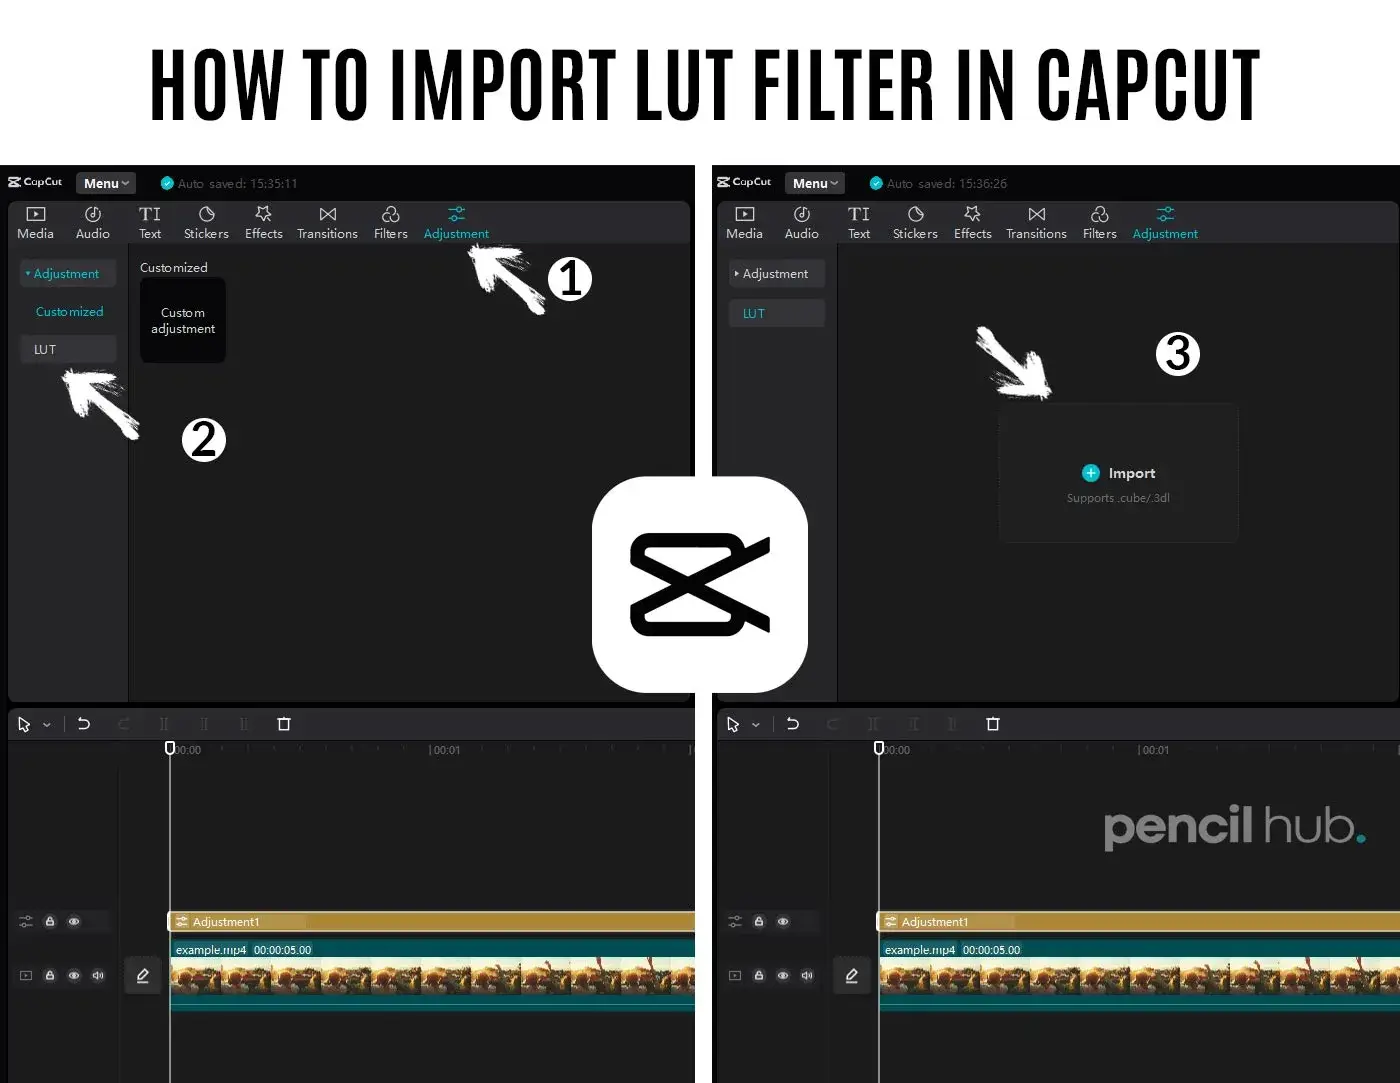
- Adding LUT Filter
- Tap video clip
- Select “Effects”
- Choose “LUT/Color Grading”
- Import custom LUT
- Advanced Settings
- Adjust filter strength
- Fine-tune brightness
- Control saturation
- Set contrast levels
Mobile Pro Tip: Save your favorite LUT settings as presets for quick access.

3. VN Editor Guide
Easy Mobile Video Enhancement
Quick Steps:
- Getting Started
- Install VN Editor
- Import your video
- Access Effects panel
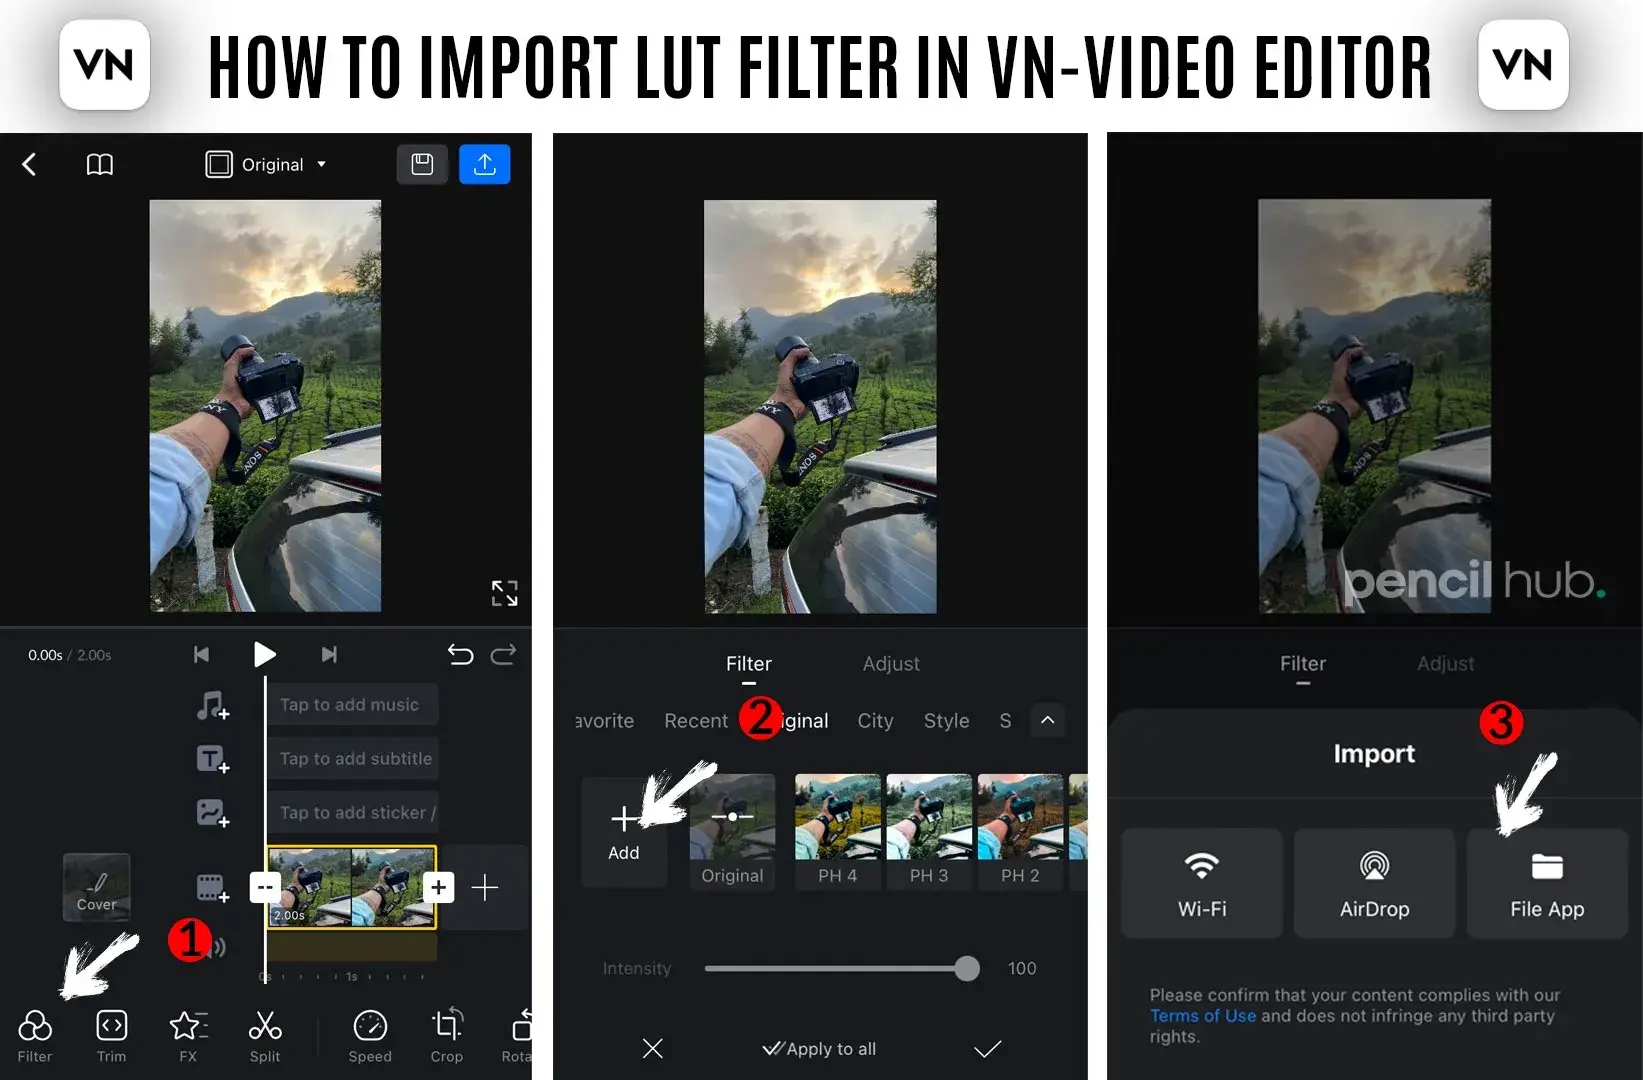
- LUT Application
- Find “Filters” section
- Select LUT option
- Import custom LUT
- Adjust intensity

Understanding Color Grading
Why Use LUT Filters?
- Instant professional look
- Consistent brand style
- Time-saving workflow
- Hollywood-style colors
- Cross-platform compatibility
Best Practices:
- Start with Good Footage
- Well-exposed video
- Proper white balance
- Clean composition
- Apply LUT Properly
- Don’t overprocess
- Maintain skin tones
- Keep contrast natural
- Final Adjustments
- Fine-tune exposure
- Check all scenes
- Export in high quality
Advanced Tips for Better Results
Professional Techniques:
- Color Matching
- Match multiple clips
- Maintain consistency
- Build visual style
- Scene Optimization
- Adjust per lighting condition
- Balance indoor/outdoor shots
- Perfect skin tones
- Export Settings
- Choose proper codec
- Select optimal bitrate
- Match platform requirements
Mobile Editing Tips
Optimize for Social Media:
- Instagram-ready looks
- TikTok-optimized presets
- YouTube-friendly colors
- Reels-perfect tones
How to Download & Install LUT Filters
For iPhone Users:
- Click download link
- Select “Open in…”
- Choose “Save to Files”
- Extract ZIP file
- Import to editing app
For Android Users:
- Download ZIP file
- Use ZArchiver/WinRAR
- Extract contents
- Import to editor
