Blog

Your blog category

Best After Effects Plugins 2025: Top 6 Reviewed

Top After Effects Plugins for 2025 – Best Tools for Video Editors & Creators What Are After Effects Plugins? Plugins in Adobe After Effects are like creative tools that extend the software’s core functions. They’re not just fancy add-ons—they’re essentials for editors, animators, and motion designers who want to work faster and create better visuals. Think of them like power-ups in a game, giving you the ability to add cinematic effects, smooth animations, and vibrant color grading without manually building everything from scratch. In 2025, the plugin landscape will have grown rapidly. Whether you’re into YouTube video editing, documentary storytelling, or designing motion graphics for clients, these plugins can transform your workflow. What Are After Effects Plugins? If you’re learning how to edit videos for YouTube, diving into Premiere Pro tutorials, or just beginning your video editing tutorial journey, plugins help you: Save hours of repetitive editing Produce high-quality visuals Add advanced animations and effects without complex coding Using plugins isn’t cheating—it’s smart editing. They’re widely used by professionals to build better content faster. If you want to stay competitive and creative, knowing the top plugins for After Effects is a must. Top 6 After Effects Plugins in 2025 We handpicked six plugins that are popular, efficient, and ideal for beginners and pros alike. Whether you’re creating a quick animation for a social media post or adding visual effects to a short film, these plugins can help. 1. AE Juice – One Pack for Everything AE Juice provides ready-to-use transitions, animations, and sound effects. The free starter pack includes more than 100 assets, which makes it ideal for students and hobbyists. Why You’ll Love It: Easy drag-and-drop interface Includes animated elements, titles, and backgrounds Speeds up your editing flow Best For: YouTubers, short-form content creators, and promo editors Download now 2. Magic Bullet Color Look – Color Like a Pro Color grading is one of the most powerful ways to elevate your video. Magic Bullet gives you a large set of cinematic presets, letting you apply film-style color tones in seconds. Why You’ll Love It: Over 300 film-inspired looks Works well for documentary-style editing Real-time preview for quick adjustments Best For: Documentary filmmakers, travel vloggers, short film editors Download now 3. Animation Composer – Speedy Motion Design Motion design is time-consuming, but Animation Composer helps eliminate that hurdle. With hundreds of pre-built presets, you can animate text, objects, and layers easily. Why You’ll Love It: Organized asset library Built-in sound effects Simple user interface Best For: Beginners learning After Effects basics or freelance motion designers Download now 4. Deep Glow – Beautiful Glow, Minimal Effort Want glowing text, energy beams, or moody lighting? Deep Glow offers glow effects that feel natural and soft, unlike the harsh defaults in After Effects. Why You’ll Love It: Realistic glow using inverse-square falloff Works seamlessly on text, masks, or shapes Great for UI/HUD animation Best For: Sci-fi intros, animated logos, gaming content Download now 5. FX Console – Find Effects in Seconds Ever spend time scrolling through menus to find the right effect? FX Console helps you apply effects instantly through a command panel. Just press a shortcut, type a few letters, and apply the effect. Why You’ll Love It: Saves tons of time in big projects Great for VFX-heavy timelines Free and maintained by Video Copilot Best For: Fast-paced editors, freelance VFX creators Download now 6. Saber – Energy, Fire, and Neon in a Click Saber is a free plugin that’s surprisingly powerful. From glowing light beams to animated outlines, Saber lets you create effects you’d normally spend hours on. Why You’ll Love It: Preloaded with 50+ presets Works with masks and text Adds life to basic graphics Best For: Music videos, tech reviews, sci-fi visuals Download now Choosing the Right Plugin for Your Project Each editor’s needs are different. A content creator focusing on video editing tutorials for beginners may want AE Juice, while a designer exploring Premiere Pro text effects might prefer Animation Composer. Here’s what to consider: Check your AE version (plugins may vary in compatibility) Use trial versions when possible Look for community reviews CONCLUTION These six plugins represent the best of what 2025 has to offer for After Effects users. If you’re serious about learning Adobe Premiere Pro tutorial for beginners, improving your design tutorials for beginners, or downloading free editing project files, plugins will help you go further, faster. Incorporate them into your workflow, and you’ll see immediate improvements in efficiency and creativity. And remember, creativity isn’t about doing everything manually—it’s about telling your story the best way possible. Whether you’re just starting to learn Adobe After Effects, or you’re upgrading your video content game, these plugins will support you every step of the way.
Best After Effects Plugins 2025: Top 6 Reviewed Read More »

AE Juice: The Ultimate Animation Toolkit for After Effects in 2025

AE Juice Plugin for After Effects: Why Every Beginner Should Have This in Their Editing Toolkit What is AE Juice? AE Juice is a plugin designed for Adobe After Effects, and some packs also work with Premiere Pro. It’s like having a toolbox full of ready-made animations, transitions, text effects, sound effects, and color grading presets — all available right inside your project.You don’t have to build every animation from scratch. You just drag, drop, tweak a few things, and boom — your project looks polished and professional.But the best part? You don’t need to be an expert. Even if you’re just starting to learn Adobe After Effects, AE Juice makes it feel way less intimidating. Download Now I Want It All Bundle LIFETIME (99% OFF) Download now All Access Subscription (50% OFF Download now Free Plugins: Download now Why I Recommend It (From Experience) When I first started editing YouTube videos and motion graphics, I struggled a lot. It would take me hours to animate simple text, and don’t even get me started on trying to match sound effects with transitions. Once I started using AE Juice, I was able to finish edits much faster — and they looked way better. It felt like going from beginner mode to “Hey, this looks pro!” — without actually becoming a pro yet. Here’s what stood out to me: It saved me so much time The animations looked clean and modern I didn’t need to learn complex keyframes or expressions It gave me the confidence to try new editing styles So if you’re doing design tutorials for beginners or just trying to level up your YouTube videos, AE Juice is a huge help. AE Juice Packs You Should Definitely Check Out AE Juice offers different packs for different needs. Here are a few that I personally found super useful — especially for those of you working on short-form content, client work, or your first YouTube channel. 1. Motion Presets Pack This one is a lifesaver. Over 200 presets for text and objects — animated slides, fades, pops, bounces, and more. It makes boring text look dynamic with just a few clicks. Great for: Titles and lower thirds Instagram reels and TikTok Learning Premiere Pro text effects 2. Sound Effects Pack I didn’t realize how much sound matters until I tried this. It includes whooshes, swooshes, impacts, clicks — all the stuff you hear in pro-level edits. Use it for: Transition sounds Text reveals Creating mood and rhythm in your videos 3. Social Media Pack If you’re a content creator, this is gold. It’s got templates and animations tailored for platforms like YouTube, TikTok, and Instagram. Includes: Animated intros and outros Engaging story formats Lower thirds for “Like, Share & Subscribe” prompts 4. Color Grading Pack Want that cinematic feel? This pack comes with LUTs and filters that instantly transform your video’s look. Just one click and your footage feels like it belongs in a movie trailer. Perfect for: Travel vlogs Short films Brand videos 5. Cinematic Pack This one’s more advanced, but still beginner-friendly. It adds those classy transitions, overlays, and film-style effects that really elevate your edit. Great for: Trailers Portfolio reels Event and wedding videos Are There Any Deals? Yes! AE Juice often runs bundle discounts, so if you buy more than one pack, you get a better deal. Also, once you buy a pack, you get free lifetime updates, which is huge. Some packs even come with free editing project files download, so you can open a sample project and see how everything is put together — a great way to learn by doing. How to Install and Use AE Juice Don’t worry — installation is super simple. Go to the AE Juice website Pick the pack(s) you want Download and install using their installer Open After Effects or Premiere Pro Start using the elements with drag-and-drop Even if you’re following an Adobe Premiere Pro tutorial for beginners, you’ll find it easy to integrate AE Juice into your workflow. Final Thoughts If you’re just getting into video editing — maybe you’re learning the ropes of After Effects, following YouTube tutorials, or launching your first channel — AE Juice is honestly one of the best investments you can make. It’s not just about adding cool effects. It’s about saving time, building confidence, and helping you actually enjoy the editing process instead of getting stuck in it. For me, it turned a frustrating learning curve into a creative playground. And I truly believe it can do the same for you.

AE Juice: The Ultimate Animation Toolkit for After Effects in 2025 Read More »

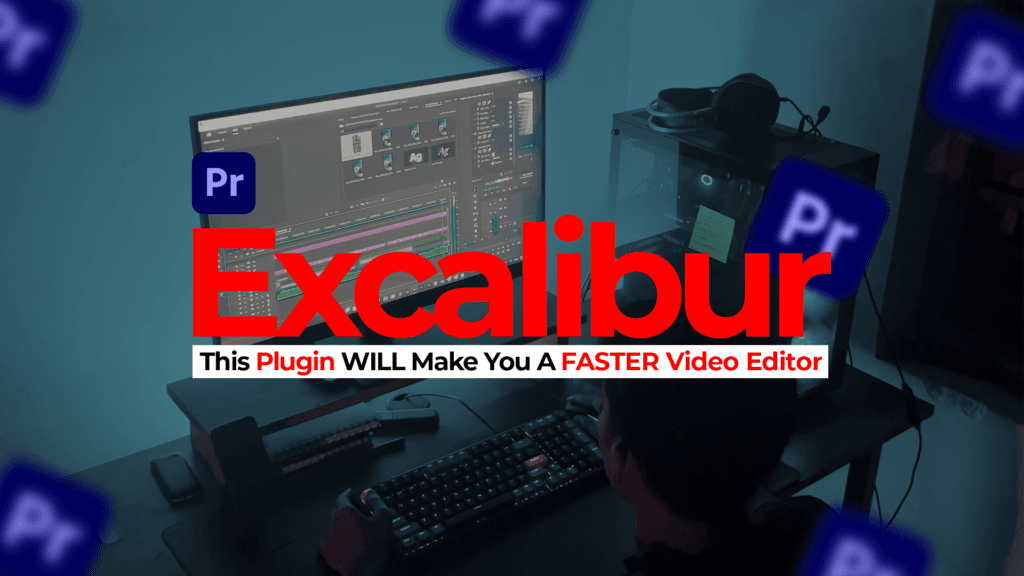
Excalibur Plugin for Premiere Pro: speed up Your Editing Workflow

Speed Up Your Editing Workflow Like a Pro: The Magic of the Excalibur Plugin for Premiere Pro!

Speed Up Your Editing Workflow Like a Pro: The Magic of the Excalibur Plugin for Premiere Pro! Are you tired of endlessly scrolling through effect panels and wasting precious editing time? Meet Excalibur – the game-changing Premiere Pro plugin that puts professional-grade effects at your fingertips with just a simple Alt + Space keystroke. What is Excalibur? Excalibur is a revolutionary effect launcher plugin for Adobe Premiere Pro that streamlines your editing workflow by providing instant access to effects, presets, and adjustments through a lightning-fast search interface. Think of it as Spotlight or Alfred, but specifically designed for Premiere Pro editors. Key Features Lightning-Fast Access: Press Alt + Space to instantly summon the Excalibur interface Smart Search: Type to instantly find any effect, preset, or adjustment Custom Presets: Save your frequently used effect combinations Keyboard-Driven Workflow: Apply effects without touching your mouse Time-Saving Shortcuts: Create custom shortcuts for your most-used effects How to Use Excalibur   Basic Usage Select your target clip or layer in your timeline Press Alt + Space to open Excalibur Type the name of the effect you want Press Enter to apply the effect Advanced Features   Creating Custom Presets Apply your desired combination of effects to a clip Open Excalibur and click “Save Preset” Name your preset and assign a keyword Access your preset instantly in future sessions Batch Processing Select multiple clips Use Excalibur to apply effects to all selected clips simultaneously Save hours of repetitive work Optimizing Your Workflow with Excalibur   Time-Saving Techniques Create effect presets for commonly used combinations Organize effects into categories for faster access Use keyboard shortcuts for frequently applied effects Batch apply effects to multiple clips simultaneously Project Management Share effect presets across team members Export and import effect settings Create project-specific effect libraries Maintain consistent looks across projects Why Editors Love Excalibur The plugin has gained widespread adoption among professional editors for several reasons: Speed: Dramatically reduces the time spent applying effects Consistency: Ensures uniform effect application across projects Flexibility: Works with all types of media and effect combinations Reliability: Stable performance and regular updates Community: Active user base sharing presets and techniques Why Excalibur Makes Editing Faster   Time Savings Traditional Method: 15-20 seconds to find and apply an effect With Excalibur: 2-3 seconds from keystroke to application Workflow Improvements Maintain creative flow without diving into panels Reduce mouse dependency Access effects without memorizing their panel locations Apply complex effect combinations in seconds Why Excalibur Makes Editing Faster   Time Savings Traditional Method: 15-20 seconds to find and apply an effect With Excalibur: 2-3 seconds from keystroke to application Workflow Improvements Maintain creative flow without diving into panels Reduce mouse dependency Access effects without memorizing their panel locations Apply complex effect combinations in seconds Technical Requirements Adobe Premiere Pro CC 2020 or later Windows 10/11 or macOS 10.15+ 8GB RAM minimum (16GB recommended) 2GB free disk space Internet connection for activation Installation Guide   Download: Get Excalibur from the official website or Adobe Exchange Install: Close Premiere Pro if it’s running Copy the ” knights_of_the_editing_table.excalibur “ and ” knights_of_the_editing_table.spellbook “ folder to the following location:               Win: C:Program Files (x86)Common FilesAdobeCEPextensions                Mac: System disk/Library ( name: Resource Library)/Application Support/Adobe/CEP/extensions Run Add Keys.reg on Win, and run install-as-admin For Mac Open Premiere Pro and Enjoy Ready to Use: Press Alt + Space to start using Excalibur Note for Mac users: We have not tested it, it may work for you, it may not work on Mac Conclusion   Excalibur isn’t just another Premiere Pro plugin – it’s a complete transformation of how you interact with effects and presets. By eliminating the traditional friction points in effect application, it allows editors to maintain their creative flow while significantly reducing editing time. Whether you’re a professional editor working on commercial projects or a content creator churning out daily videos, Excalibur can revolutionize your editing workflow. Download plugin Download original [ paid ] Download Download cracked [ free ] Download

Speed Up Your Editing Workflow Like a Pro: The Magic of the Excalibur Plugin for Premiere Pro! Read More »

5 Best Cinematic Fonts to Make Your Project Stand Out

5 Best Cinematic Fonts to Make Your Project Stand Out Ever wondered why some videos and films just feel more professional and captivating? The secret might be hiding in plain sight – it’s all about the fonts! Let’s dive into five amazing cinematic fonts that can transform your project from good to unforgettable. Understanding Cinematic Fonts: More Than Just Letters Before we jump into our top picks, let’s talk about what makes a font truly cinematic. Think of fonts as the voice of your visuals – they set the mood, tell a story, and grab attention without saying a word. From sleek movie titles to powerful end credits, the right font can make your audience feel exactly what you want them to feel. How to Choose the Perfect Cinematic Font Picking the right font isn’t just about what looks cool. Here’s what you need to think about: Readability: Your audience needs to read it easily, whether it’s on a big screen or mobile device Mood match: The font should fit your project’s emotional tone Versatility: Good fonts work well in different sizes and colors Brand fit: Make sure it matches your overall style Top 5 Cinematic Fonts You Need to Know 1. Poppins: The Friendly Professional   Poppins hits that sweet spot between professional and welcoming. Its rounded edges and clean lines make it perfect for projects that need to feel approachable yet credible. Think of it as the font equivalent of a firm handshake and a warm smile. Perfect for: Educational content Explainer videos Social media content Youth-oriented projects Download Poppins 2. Montserrat: The Modern Classic   Montserrat brings that perfect balance of modern edge and timeless appeal. Originally inspired by old posters and signs from Buenos Aires, this font family gives your projects a contemporary yet sophisticated feel. Perfect for headlines and titles that need to make a statement without screaming for attention. What makes it great: Clean, geometric lines Excellent readability at any size Works beautifully for both titles and body text Great for tech, fashion, and contemporary productions Download Montserrat 3. San Francisco: Apple’s Secret Weapon   Developed by Apple, San Francisco brings that premium, high-tech feel to your projects. It’s the font you see in modern tech commercials and sleek product videos. This font family screams professionalism while maintaining a friendly, approachable vibe. Best used for: Tech-focused content Modern documentaries Corporate videos User interface elements in video projects Download San Francisco 4. Photograph Signature: The Emotional Touch Newsreader combines classical elements with modern design principles. It’s the font you want when your project needs to convey authority and sophistication without feeling stuffy or outdated. Works best in: News-style productions Historical documentaries Interview segments Download Newsreader 5. Photograph Signature: The Emotional Touch When you need to add that personal, handcrafted feel to your project, Photograph Signature delivers. This script font brings authenticity and emotion to your titles, making it perfect for personal stories, documentaries, or anything needing that human touch. Ideal uses: Documentary titles Personal vlogs Wedding videos Emotional storytelling Download Photograph Signature Font Moods and What They Convey   Different fonts trigger different emotional responses: Sans-serif fonts (like Montserrat and San Francisco): Modern, clean, straightforward Script fonts (like Photograph Signature): Personal, emotional, authentic Serif fonts (like Newsreader): Traditional, trustworthy, sophisticated Pro Tips for Using Cinematic Fonts Don’t mix more than 2-3 fonts in one project Test your fonts at different sizes and backgrounds Consider your audience’s viewing device Make sure your font pairs well with your footage Keep consistency throughout your project Wrapping Up The right font can take your video from amateur to professional in seconds. These five fonts offer a solid foundation for any cinematic project. Remember, the best font serves your story while keeping your audience engaged. Whether creating a YouTube video, short film, or full-length documentary, these fonts will help you create that professional, cinematic look you’re after. Remember to match your font choice with your content’s mood and message, and you’ll be golden! Want to try these fonts out? Most are available through Google Fonts or Adobe Fonts. Start experimenting and see how they can elevate your next project!

5 Best Cinematic Fonts to Make Your Project Stand Out Read More »

How to Create a Floating Text & Image Effect in Premiere Pro

How to Create a Floating Text & Image Effect in Premiere Pro Want to make your titles, images, and graphics pop in your videos? Using the floating text and image effect in Adobe Premiere Pro, you can give elements a unique, subtle movement, making them appear as if they’re gently bobbing or hovering. This effect not only adds visual interest but can also enhance readability, highlight key features, and add a touch of professionalism. Benefits of the Floating Effect Attention-grabbing: The subtle floating effect naturally draws the viewer’s eye. Enhanced Readability: Floating elements stand out against the background, improving clarity. Polished Look: The effect adds a refined touch that elevates your video content. How to Create the Floating Effect in Premiere Pro Follow these simple steps to animate text or images for a professional floating look: Step-by-Step Guide Select the Layer to Animate Start by selecting the text or image layer you want to animate. Add Keyframes Go to the Effects Controls panel and locate the Transform properties. Click the stopwatch icon next to Position to set your first keyframe. Animate the Float Move the playhead forward by 3-5 frames. Adjust the X and Y position values slightly for a soft bobbing effect. Smaller changes create a gentle movement, while larger adjustments create a more noticeable float. Repeat for Fluid Motion Repeat the previous steps, moving the playhead forward and adjusting position values slightly. Aim for about 5-7 keyframes for a smooth floating effect. You can speed up the process by copying and pasting keyframes (Ctrl/Cmd + C, Ctrl/Cmd + V). Smoother Animation (Optional) Select all keyframes, right-click, and choose Temporal Interpolation > Bezier for a more natural movement. This smooths the animation path between keyframes, giving a more organic look. Final Touches Preview the Animation: Playback your video to check the effect and make any necessary tweaks to the keyframes. Adjust Animation Speed: Experiment with how much you move the playhead between keyframes for faster or slower movement. Add Rotation (Optional): For a dynamic touch, adjust the Rotation property under Transform. By following these steps, you can create an eye-catching floating text and image effect in Premiere Pro that enhances your video’s visual appeal and keeps viewers engaged. This technique is ideal for social media graphics, product callouts, or adding a unique flair to standard titles and infographics. Download Floating effect

How to Create a Floating Text & Image Effect in Premiere Pro Read More »

3 best plugins for premiere pro [ free download ]

3 best plugins for premiere pro [ free download ] Looking to enhance your video editing without spending a dime? As a professional editor, I’ve tested dozens of Premiere Pro plugins, and I’m excited to share the best free options that have transformed my editing workflow. Let’s dive into these game-changing tools that can take your videos from good to exceptional. Understanding Premiere Pro Plugins: Your Secret Weapon Before we jump into the specifics, let’s break down what plugins actually do for your editing workflow: Think of plugins as power-ups for Premiere Pro They add new features and effects you didn’t know you needed Save hours of editing time with pre-built effects Create professional-looking content without advanced technical skills Top 3 Free Premiere Pro Plugins That Will Transform Your Editing 1. Mr. Horse Premiere Composer:  Why You’ll Love It: Massive library of drag-and-drop animations Professional-grade transitions Customizable text presets Perfect for creating engaging social media content Installation Guide: Visit the Premiere Composer website Create your free account Download the appropriate version (Windows/Mac) Extract and run the installer Launch Premiere Pro and log in to activate Pro Tip: Start with the basic animations and gradually experiment with more complex ones as you get comfortable with the interface. Download Mr. Horse Premiere Composer 2. AEjuice: Standout Features: Professional light leak effects Dynamic text animations Cinema-grade color presets After Effects quality without leaving Premiere Quick Installation Steps: Head to AEjuice’s official website Sign up for a free account Download your OS-specific version Run the installation package Open Premiere Pro and activate your plugin Editor’s Note: The light leak effects are stunning for wedding and music videos. Download AEjuice 3. Motion Bro:  What Makes It Special: Extensive transition library One-click application Customizable settings Smooth, professional results Download Motion Bro How These Plugins Will Improve Your Videos Immediate Benefits: Save hours of editing time Create more professional-looking content Access advanced effects without technical expertise Stand out from other content creators Perfect For: YouTube content creators Social media managers Wedding videographers Corporate video producers Pro Tips for Using These Plugins Start Simple: Begin with basic effects Learn one plugin at a time Practice with short projects first Optimize Your Workflow: Create custom presets Save your favorite effects Use keyboard shortcuts Avoid Common Mistakes: Don’t overuse effects Keep transitions consistent Back up your presets Conclusion These free plugins are absolute game-changers for Premiere Pro users. Whether you’re just starting out or looking to upgrade your editing toolkit, these tools will help you create more professional, engaging content without breaking the bank. Frequently Asked Questions Q: Will these plugins slow down Premiere Pro? A: No, they’re optimized for smooth performance, though results may vary based on your computer specs. Q: Do I need to update these plugins regularly? A: Yes, regular updates ensure compatibility with new Premiere Pro versions and add new features. Q: Can I use these plugins for commercial projects? A: Yes, all these plugins are cleared for commercial use in their free versions.

3 best plugins for premiere pro [ free download ] Read More »

Top 5 Creative Video Transitions in Adobe Premiere Pro: A Complete Guide

Top 5 Creative Video Transitions in Adobe Premiere Pro: A Complete Guide Want to take your video editing skills to the next level? Let me walk you through some game-changing transitions in Premiere Pro that I’ve personally used across countless projects. These aren’t your typical cut-and-fade effects – we’re talking about truly eye-catching transitions that will make your videos stand out. Why Custom Transitions Matter in Video Editing Think about the last time a video really grabbed your attention. Chances are, smooth, creative transitions played a huge role. As a video editor with years of experience in Premiere Pro, I can tell you that mastering custom transitions is what separates good videos from great ones. They’re not just fancy effects – they’re storytelling tools that help maintain viewer engagement and create a professional flow. The 5 Must-Know Premiere Pro Transitions 1. Flash Shake Transition: Adding Energy to Your Videos Remember those dynamic transitions you see in music videos and action sequences? That’s often the Flash Shake transition at work. Here’s what makes it special: Creates an energetic burst of light Adds a subtle camera shake effect Perfect for high-energy scene transitions Works especially well in music videos and sports content 2. Speed Ramping: Control Time Like a Pro Speed ramping is my go-to technique when I want to add dramatic impact. Ever noticed how some videos smoothly slow down before speeding up again? That’s speed ramping in action. It’s particularly effective for: Sports highlights Music videos Product demonstrations Building tension in storytelling 3. Masking Transitions: Seamless Scene Changes Masking is like having a magic wand for transitions. By strategically revealing or hiding parts of your footage, you can create some seriously smooth effects. I’ve found it works best for: Travel videos Corporate presentations Real estate tours Product showcases 4. Ink Splatter Effect: Creative Artistic Transitions Looking to add an artistic flair? Ink splatter transitions are your answer. Here’s my quick guide to nailing this effect: Where to find overlays: Search YouTube for “ink splatter overlay video” Best uses: Creative portfolios, music videos, and artistic content Pro tip: Adjust opacity and blending modes for unique results 5. Light Leak Transitions: Add Cinematic Magic Light leaks can transform ordinary footage into cinematic gold. They’re perfect for: Wedding videos Travel content Nostalgic sequences Dreamlike scenes Pro Tips for Using These Transitions Don’t overuse any single transition – variety is key Match the transition style to your content’s mood Practice timing for maximum impact Consider your audience’s expectations Download files Frequently Asked Questions Q: Where can I find transition overlays? A: YouTube is a great resource – search for specific overlay types like “light leak overlay” or “ink splatter overlay.” Q: Are these transitions suitable for beginners? A: Absolutely! Start with basic versions and gradually experiment with more complex effects. Q: Do I need plugins for these transitions? A: While plugins can help, all these transitions can be created using Premiere Pro’s built-in tools. Remember, the key to great transitions isn’t just knowing how to create them – it’s knowing when and where to use them. Keep practicing, and you’ll develop an instinct for what works best in different situations. https://youtu.be/ROQROfKulMI?si=A8C3A6MRV_9tdv2_

Top 5 Creative Video Transitions in Adobe Premiere Pro: A Complete Guide Read More »

How to Create Viral AI-Generated Videos: Step-by-Step Guide

How to Create Viral Faceless AI Videos: A Beginner-Friendly Step-by-Step Guide If you’ve scrolled through YouTube Shorts, Instagram Reels, or TikTok lately, chances are you’ve come across those slick, story-driven videos narrated by an AI voice — no faces, just visuals, text, and a powerful script. These faceless AI videos are exploding in popularity, and it’s easy to see why. They’re fast to produce, low-cost, and insanely effective at grabbing attention. And the best part? You don’t need to be a video editing pro to make them. In this guide, I’ll walk you through exactly how to make your own viral AI videos using simple tools — even if you’re just starting out with video editing tutorials or learning the After Effects basics. Why Faceless AI Videos Are Taking Over Let’s face it — not everyone wants to be on camera. That’s where faceless videos shine. They focus more on storytelling, motion graphics, and engaging visuals. Here’s why they’re gaining massive traction: They speak to a global audience – No language or culture barrier Easy to scale – Produce multiple videos quickly Low budget, high impact – No camera, crew, or fancy setup needed Privacy-friendly – Perfect if you prefer to stay anonymous Mystery factor – Viewers stay hooked without knowing who’s behind the screen If you’re learning how to edit videos for YouTube or building content for Instagram or TikTok, this is a golden opportunity to stand out. How to Make Viral AI Videos (No Experience Needed) Here’s a five-step formula I’ve used (and seen others use successfully) to create faceless AI videos that rack up thousands — sometimes millions — of views. Step 1: Write a Captivating Script This is where your message comes to life. You don’t need to be a pro copywriter — just keep things clear, engaging, and easy to follow. What to do: Use tools like ChatGPT to brainstorm ideas and structure your script Hook your audience in the first 5 seconds Talk about real problems or trending topics Keep your tone friendly, informative, and human End with a strong call-to-action Pro Tip: Tailor your script length based on platform: YouTube Shorts = 60 seconds Instagram Reels = 90 seconds TikTok = 15–90 seconds If you’re following a video editing tutorial for beginners, this step helps shape everything else. Step 2: Design Your AI Character This is the face (sort of) of your brand — the visual persona. You can use free or paid image generators to create one. Top tools to try: Midjourney – For stylized, artistic designs Leonardo.ai – Great for character consistency DALL·E or Stable Diffusion – Excellent for creative flexibility Design Tips: Keep your character style consistent across all videos Choose colors and looks that reflect your niche (e.g., tech, education, finance) Test different looks with your audience to see what resonates Bonus: If you’re also learning design, this doubles as a fun design tutorial for beginners. Step 3: Turn Text into Voice Narration gives your video personality — even if it’s computer-generated. But don’t settle for robotic audio. Use tools that offer emotion, tone, and clean delivery. Try this: DupDub (or similar tools) to convert your script into high-quality voiceovers Choose accents, genders, tones, and pacing based on your audience and topic Checklist before you move on: Audio is clear and properly paced Tone matches your message (serious, fun, educational) No background noise Volume levels are even If you’re learning how to edit videos for YouTube, solid audio makes a massive difference in viewer retention. Step 4: Animate Your Character with Talking Photo Videos Once your character and voice are ready, it’s time to bring everything to life. You don’t need animation skills — just the right tool. Use HeyGen (or similar): Upload your AI image Sync it with your voiceover Choose between portrait (9:16) or landscape (16:9) format Add basic expressions and gestures Keep it realistic but simple Remember, subtle animations tend to perform better. Overdoing it can feel unnatural. Step 5: Edit Like a Pro (Even if You’re Not One) This is where the magic happens. Combine your visuals, audio, and effects into one smooth, scroll-stopping video. Easy Editing Tools: CapCut – Free, mobile-friendly, ideal for beginners DaVinci Resolve – Powerful and free Adobe Premiere Pro – A must-learn if you’re serious about video editing Final Cut Pro – Mac-based but amazing Must-Have Editing Elements: On-screen captions (use big, bold fonts) B-roll visuals or supporting images Smooth transitions and motion graphics Color correction or grading for mood Catchy, copyright-free background music Subtle effects like zoom-ins, highlights, and pattern interrupts If you’re diving into a Premiere Pro tutorial or exploring Premiere Pro text effects, this is your playground. Tips to Help Your AI Videos Go Viral You’ve got the tools — now here’s how to make sure people actually see and engage with your content:  Strategy Post at least 3–5 times per week Study top videos in your niche — what’s working? Use trending audio or visual styles Engage with every comment — boost your reach Repurpose your video across multiple platforms  Technical Optimization Use platform-specific sizes (9:16 for Shorts/Reels) Design a thumbnail if uploading to YouTube Add subtitles (most people watch on mute) Compress for fast loading but retain high quality  Track and Grow Use analytics tools to track engagement and retention A/B test scripts, styles, and characters Ask for viewer feedback and adjust accordingly Keep a content calendar to stay consistent Mistakes to Avoid Even pros slip up sometimes. Here are common pitfalls to avoid: Over-complicating your story Using robotic or unclear voiceovers Ignoring basic video SEO Uploading without captions or thumbnails Copying other videos without adding your twist Final Thoughts Creating faceless AI videos isn’t just a trend — it’s a smart, scalable way to build a brand, teach a topic, or entertain an audience. Whether you’re still learning the After Effects basics, diving into a video editing tutorial for beginners, or exploring free editing project files download, the tools are accessible — and the creative possibilities

How to Create Viral AI-Generated Videos: Step-by-Step Guide Read More »

How to Use Malayalam Fonts on Your Mobile Phone: Step-by-Step Guide

How to Use Malayalam Fonts on Mobile for Video Editing and Design Want to create stunning videos with beautiful Malayalam text? You’re in the right place! This video editing tutorial for beginners will show you exactly how to add Malayalam fonts to your projects using popular mobile apps. What You’ll Master in This Tutorial This comprehensive guide covers everything you need to know about Malayalam fonts in video editing: Installing Malayalam fonts on your mobile device How to edit videos for YouTube with Malayalam text Adobe Premiere Pro tutorial for beginners (mobile alternatives) After effects basics for text styling Free editing project files download tips Design tutorials for beginners using Malayalam fonts Why Malayalam Fonts Matter in Video Editing Creating content in Malayalam opens up incredible opportunities for connecting with your audience. Whether you’re making YouTube videos, social media content, or professional presentations, custom Malayalam fonts help you: Stand out from generic content creators Build stronger connections with Malayalam-speaking viewers Create professional-looking titles and graphics Maintain consistent branding across your projects Improve viewer engagement and retention Getting Started: What You Need Before diving into this video editing tutorial for beginners, gather these essentials: A smartphone with decent storage space VN Video Editor or PicsArt app File manager app (built-in or third-party) Malayalam font files (TTF or OTF format) Stable internet connection Method 1: Adding Malayalam Fonts to VN Video Editor VN Video Editor is perfect for beginners who want to learn video editing basics without complexity. Here’s how to edit videos for YouTube with Malayalam fonts: Step 1: Download Your Malayalam Font Package Start by finding quality Malayalam font files: Search for “Malayalam TTF fonts” online Download the font package to your phone Save it in your Downloads folder for easy access Make sure the file is in ZIP format for easier handling Step 2: Extract and Organize Your Fonts Once downloaded, you need to prepare the fonts: Open your phone’s file manager Navigate to your Downloads folder Find the Malayalam font ZIP file Extract the contents using your file manager Create a dedicated “Malayalam Fonts” folder for organization Step 3: Import Fonts into VN Video Editor This is where the magic happens in your video editing tutorial for beginners journey: Launch VN Video Editor on your device Start a new project or open an existing one Look for the font import option in text settings Browse to your extracted Malayalam font folder Select the font file you want to use Wait for the import process to complete Step 4: Apply Malayalam Text to Your Videos Now you can create professional-looking content: Add a text layer to your video timeline Access the font menu and find “My Fonts.” Select your imported Malayalam font Type your Malayalam text Adjust size, color, and positioning Preview your work before finalizing Method 2: Using Malayalam Fonts in PicsArt PicsArt offers excellent design tutorials for beginners who want to create graphics and thumbnails: Getting Your Fonts Ready Preparation is key for smooth workflow: Download your Malayalam font collection Extract all files to a dedicated folder Note the exact location for easy access Test one font file first before importing multiple fonts Installing Fonts in PicsArt Follow this Adobe Premiere Pro tutorial for beginners approach (adapted for mobile): Open PicsArt and create a new project Tap the Text tool from the toolbar Look for “Add Font” or “Custom Font” option Browse to your Malayalam font folder Select and import your chosen font Confirm the installation Creating Graphics with Malayalam Text Transform your ideas into visual content: Add text elements to your design Select your newly imported Malayalam font Experiment with different text effects Apply colors and styling that match your brand Save your work for future projects Advanced Tips: After Effects Basics for Malayalam Text While mobile apps are great for beginners, understanding after effects basics helps you appreciate text animation principles: Text Animation Concepts Learn these fundamental concepts: Keyframe animation for smooth text movements Layer management for complex compositions Color theory for better visual impact Typography principles for Malayalam text Export settings for different platforms Professional Workflow Tips Develop habits that improve your efficiency: Always backup your font files Create template projects for consistent branding Test fonts on different devices before publishing Keep a library of successful text treatments Document your settings for future reference Troubleshooting Common Malayalam Font Issues Download font

How to Use Malayalam Fonts on Your Mobile Phone: Step-by-Step Guide Read More »

Best Export Settings for Instagram Reels

Best Export Settings for Instagram Reels: A Complete Video Editing Tutorial Are you struggling with blurry, pixelated Instagram Reels that don’t reflect your hard editing work? You’re not alone. Many creators following basic video editing tutorials still face frustrating compression issues that can ruin their carefully crafted content. In this comprehensive guide, we’ll walk you through proven export settings that will help your Reels look crisp and professional every time. Why Video Quality Matters for Your Instagram Success Poor video quality can seriously impact your Reels’ performance and growth: Lower engagement rates due to viewer drop-off Reduced reach and visibility in Instagram’s algorithm Diminished visual appeal that hurts your brand Less professional appearance compared to competitors Instagram’s compression algorithm can be harsh on poorly exported videos. However, with the right video editing tutorials and export knowledge, you can work with the platform instead of against it. Studies show that enabling “High quality uploads” in your Instagram settings can significantly improve your video output quality. Best Export Settings for Instagram Reels 1. Technical Specifications That Actually Work  Based on extensive testing by professional creators, here are the optimal settings: Video Format: MP4 (H.264 codec) Resolution: 1080 x 1920 pixels (9:16 aspect ratio) Frame Rate: 30 fps Bitrate: Target bitrate of 15-20 Mbps for optimal quality, with maximum bitrate around 24 Mbps Maximum File Size: Keep under 4GB Audio: AAC codec, 48kHz sample rate, stereo    2. Advanced Resolution Tips for Better Quality While Instagram officially supports 1080p, many successful creators are pushing beyond these limits. Some creators export in 2K or 4K resolution and report no visible compression on Instagram, though aiming for 1440p (1440×2560 pixels) can provide an excellent balance between quality and file size. Step-by-Step Export Process for Popular Editing Software PC/Desktop Export Settings   Adobe Premiere Pro Tutorial Follow these video editing tutorial steps for professional results: Go to File > Export > Media Select H.264 format from the dropdown Set custom dimensions to 1080×1920 Choose the VBR 2 Pass encoding method Set target bitrate: 15-20 Mbps, maximum: 24 Mbps Frame rate: 30fps constant Enable “Render at Maximum Depth” for better color Audio: AAC, 48kHz, 320 kbps Export and test the upload quality After Effects Tutorial for Motion Graphics When working with motion graphics and effects: Create a composition at 1080×1920, 30fps Add to Adobe Media Encoder render queue Use H.264 preset, modify these settings: Bitrate: VBR 2 Pass, 15-20 Mbps target Profile: High Level: 4.2 Enable GPU acceleration for faster rendering Set field order to “Progressive” Preview before final export DaVinci Resolve (Free Professional Option) Perfect for creators following video editing tutorials on a budget: Go to the Deliver tab at the bottom Select the “YouTube” preset as the starting point Modify these settings: Resolution: Custom 1080×1920 Frame rate: 30fps Codec: H.264 Quality: Choose “Custom” and set to 15,000 kbps Audio codec: AAC, 48kHz Click “Add to Render Queue” Start render process Final Cut Pro (Mac Users) For Mac-based video editing tutorials: Select your timeline and go to File > Share > Master File Choose these settings: Format: Video and Audio Video codec: H.264 Resolution: 1080×1920 Frame rate: 30fps Data rate: 20,000 kbps Click “Next” and export Mobile Editing Apps Export Settings CapCut (Most Popular Free App) For design tutorials for beginners using mobile apps: Tap “Export” after editing Select “4K 60fps” for highest quality Choose “Standard” export speed Enable “Smart HDR” if available Let Instagram handle final compression Export time: 2-5 minutes depending on length VN Video Editor Professional mobile editing option: Tap export icon (up arrow) Select “2K” resolution option Choose “High” quality setting Frame rate: 30fps Format: MP4 Enable “Hardware acceleration” if available Upload Best Practices for Maximum Quality Before Uploading Use strong WiFi connection Clear Instagram app cache Enable “High Quality Uploads” in settings Upload during off-peak hours for better processing During Upload Process Open Instagram and tap the + icon Select “Reel” from the options Import your optimized video file Add minimal filters (they can degrade quality) Write engaging captions with relevant keywords Use strategic hashtag combinations Preview thoroughly before posting Advanced Tips for Professional Results   Test different export settings with short sample clips Keep original project files backed up Monitor your Reels’ performance using Instagram Analytics Study successful creators’ video quality in your niche Experiment with different bitrate settings for your content type For motion-heavy content like dance or sports, higher bitrates perform better. For talking-head content, you can optimize for smaller file sizes. Conclusion Mastering Instagram Reels export settings doesn’t have to be complicated when you follow proven video editing tutorials and techniques. By implementing these specific export settings – from the optimal 15-20 Mbps bitrate to the crucial 1080×1920 resolution – you’ll create content that looks professional and engages your audience effectively. Remember that quality matters, but consistency is equally important. Keep experimenting with these settings until you find what works best for your content style. Whether you’re following premiere pro tutorial guides or after effects tutorial workflows, these export fundamentals will serve as your foundation for success. For more advanced techniques and platform-specific strategies, check out our comprehensive guide on social media video optimization and our collection of editing workflow templates.

Best Export Settings for Instagram Reels Read More »